Adding Storage To Lenovo Laptop

Before purchasing anything, I would usually do a lot of research about reliability, pricing, and support. Another factor is upgradability.

I wanted to buy an IdeaPad laptop directly from Lenovo, but it was not as customizable as I would like it to be.

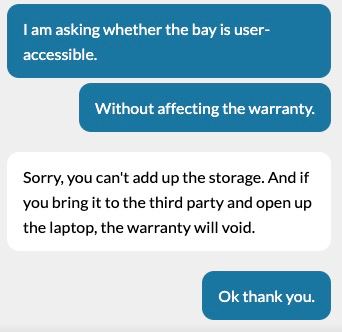
The laptop has multiple configuration options, there are models with an SSD and HDD, and some models with only SSD. I wanted to buy one with only a single 512 GB M.2 2242 SSD and upgrade in the future. When I contacted Lenovo sales via chat, they told me that it is impossible to add a new drive, that it would void the warranty.

I decided to buy one with a single M.2 SSD anyway.

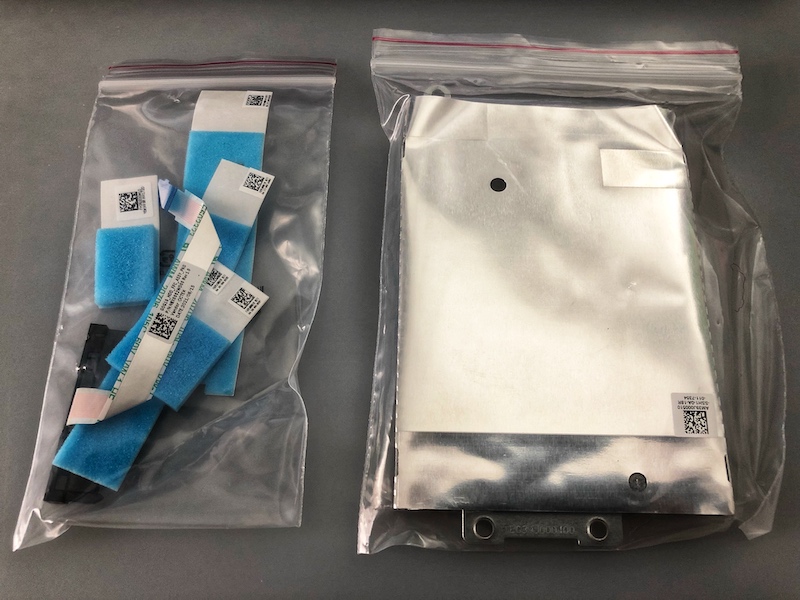
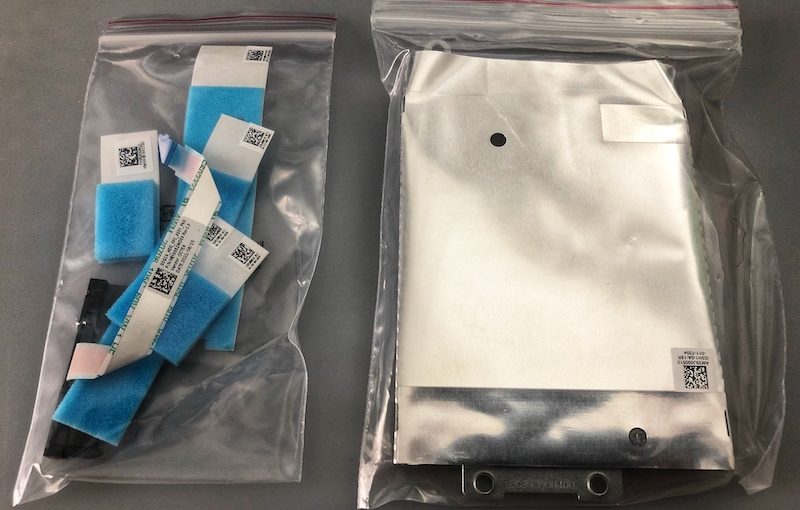
The interesting this is that a disk caddy (including cables) is included indicating that we are allowed to add a disk on our own.

I haven’t tried to open the bottom panel yet, but I guess it’s normal these days to be able to add a disk into the disk bay.

There you go, I should be able to add a drive when needed 👍🏼

Restricting xmlrpc.php

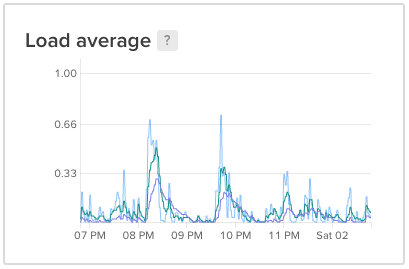
Earlier today, I saw some spikes on the load graph for the new server (where this site is hosted).

Upon checking the logs I saw a lot of these:

134.122.53.221 - - [01/May/2020:12:21:54 +0000] "POST //xmlrpc.php HTTP/1.1" 200 264 "-" "Mozilla/5.0 (Windows NT 10.0; Win64; x64) AppleWebKit/537.36 (KHTML, like Gecko) Chrome/78.0.3904.108 Safari/537.36"
134.122.53.221 - - [01/May/2020:12:21:55 +0000] "POST //xmlrpc.php HTTP/1.1" 200 264 "-" "Mozilla/5.0 (Windows NT 10.0; Win64; x64) AppleWebKit/537.36 (KHTML, like Gecko) Chrome/78.0.3904.108 Safari/537.36"
198.98.183.150 - - [01/May/2020:13:44:24 +0000] "POST //xmlrpc.php HTTP/1.1" 200 265 "-" "Mozilla/5.0 (Windows NT 10.0; Win64; x64) AppleWebKit/537.36 (KHTML, like Gecko) Chrome/80.0.3987.149 Safari/537.36"
198.98.183.150 - - [01/May/2020:13:44:25 +0000] "POST //xmlrpc.php HTTP/1.1" 200 265 "-" "Mozilla/5.0 (Windows NT 10.0; Win64; x64) AppleWebKit/537.36 (KHTML, like Gecko) Chrome/80.0.3987.149 Safari/537.36"

I’m not mentioning the source IP owner, technical readers can look it up if they are interested. However, the second IP comes from a IP range that is rather interesting.

Searching the Internet, I found out that many people consider the xmlrpc.php as a problem. For those who are not familiar with WordPress, this file is responsible for external communications. For example when using the mobile application to manage your site, and also when you use Jetpack.

There are plugins to disable XML-RPC such as this one, but I use the app from time to time, so I would like to keep xmlrpc.php working.

The official Jetpack website provides this list for whitelisting purposes.

I have been restricting access to my /wp-admin URL for ages, using Nginx. I think it is a good idea to do the same for xmlrpc.php.

location ~ ^/(xmlrpc\.php$) {
    include conf.d/includes/jetpack-ipvs-v4.conf;
    deny all;
 
    include fastcgi.conf;
    fastcgi_intercept_errors on;
    fastcgi_pass php;
}

The simple script to update this IP list into Nginx configuration, that is consumed by the configuration above:

#!/bin/bash
 
FILENAME=jetpack-ipvs-v4.conf
CONF_FILE=/etc/nginx/conf.d/includes/${FILENAME}
 
wget -q -O /tmp/ips-v4.txt https://jetpack.com/ips-v4.txt
 
if [ -s /tmp/ips-v4.txt ]; then
  cat /tmp/ips-v4.txt | awk {'print "allow "$1";"'} > /tmp/${FILENAME}
 
  [ -s ${CONF_FILE} ] || touch ${CONF_FILE}
 
  if [ "$(diff /tmp/${FILENAME} ${CONF_FILE})" != "" ]; then
    echo "Files different, replacing ${CONF_FILE} and reloading nginx"
    mv -fv /tmp/${FILENAME} ${CONF_FILE}
    systemctl reload nginx
  else
    echo "File /tmp/${FILENAME} match ${CONF_FILE}, not doing anything"
  fi
fi
 
rm -f /tmp/ips-v4.txt

It can be periodically executed by cron so that when the IP list changes, the configuration gets updated.

Now, if any IP other than Jetpack tries to access /xmlrpc.php it will receive Error 403 Forbidden.

Have fun!

Moving Domains to Cloudflare

While clicking around in Cloudflare today, I found this button.

It got me into thinking about what I paid last year for a .com domain and this is what I see when I looked at the order history.

I was surprised to see the difference. At the current exchange rate, Cloudflare will only cost me MYR34.89 (US$8.03 with ICANN fee) for a .com domain, which is a saving of MYR40.33 per domain, per year.

Looking at all domains transferable to Cloudflare, this is what it would cost me if I renew them right now:

If I transfer them to Cloudflare, it will cost me US$60.28 (MYR261.93) per year, which is a saving of US$66.75 (MYR290.07) equivalent to a year of mid-size shared hosting in Malaysia, or a full year of hosting cost with my current cloud provider.

Mind. Blown. 🤯

Cloudflare offers at-cost pricing for registration and renewal of many TLDs, but unfortunately .name is not one of them so I won’t be able to move romantika.name to them. For now.

Flask + GitLab OAuth

I’m back. A lot of things have changed since I last wrote and one of that is my go-to language.

Earlier today, I needed to write a simple Flask application using GitLab as the OAuth2 provider.

I immediately turned to Flask-OAuth to do the job, but it keeps on failing with:

SSLHandshakeError: [Errno 1] _ssl.c:510: error:14090086:SSL routines:SSL3_GET_SERVER_CERTIFICATE:certificate verify failed

It seems to be a problem with httplib2.

After struggling for quite some time, I found Flask-OAuthlib that claims to be a replacement for the outdated Flask-Oauth. It worked like a charm.

GitLab’s documentation on consuming its OAuth2 is quite basic. Below is a basic implementation that works.

All you need to do is change the gitlab.example.com to your GitLab server, and add the consumer_key and consumer_secret. If successful, the main page will display a JSON with the logged on user’s details.

from flask import Flask, render_template, redirect, url_for, session, request, jsonify
from flask_oauthlib.client import OAuth
 
app = Flask(__name__)
app.debug = True
app.secret_key = 'development'
oauth = OAuth(app)
 
gitlab = oauth.remote_app('gitlab',
    base_url='https://gitlab.example.com/api/v3/',
    request_token_url=None,
    access_token_url='https://gitlab.example.com/oauth/token',
    authorize_url='https://gitlab.example.com/oauth/authorize',
    access_token_method='POST',
    consumer_key='',
    consumer_secret=''
)
 
@app.route('/')
def index():
    if 'gitlab_token' in session:
        me = gitlab.get('user')
        return jsonify(me.data)
    return redirect(url_for('login'))
 
 
@app.route('/login')
def login():
    return gitlab.authorize(callback=url_for('authorized', _external=True, _scheme='https'))
 
 
@app.route('/logout')
def logout():
    del session['gitlab_token']
    return redirect(url_for('index'))
 
@app.route('/login/authorized')
def authorized():
    resp = gitlab.authorized_response()
    if resp is None:
        return 'Access denied: reason=%s error=%s' % (
            request.args['error'],
            request.args['error_description']
        )
    session['gitlab_token'] = (resp['access_token'], '')
    return redirect(url_for('index'))
 
@gitlab.tokengetter
def get_gitlab_oauth_token():
    return session.get('gitlab_token')
 
if __name__ == "__main__":
    app.run()

I hope it saves someone some time.

CloudWatch INSUFFICIENT_DATA for Linux System Metric

I recently had to recreate images for our production systems on EC2 because they didn’t have ephemeral storage that we require to keep our temporary tcp dumps. Considering that they are EC2 instances, it was quite easy.

We use mon-get-instance-stats.pl to monitor system metrics such as memory utilization and disk space.

Naturally, I copied alarms from the old instances and just replaced the InstanceId with the new ones. However, I was baffled to see CloudWatch complaining that the alarms has INSUFFICIENT_DATA. Attempting to verify, mon-get-instance-stats.pl --verify showed the wrong InstanceId.

It wasn’t after I ransacked the whole filesystem I realized that the Perl scripts are caching information in /var/tmp/aws-mon. Remove (or move) that directory and all is well again.

I hope this saves someone some time.

DD-WRT: OpenVPN Server Using Certificates

GUI confuses me sometimes, so I prefer to make configurations in text files. For DD-WRT, OpenVPN server is available in OpenVPN, OpenVPN Small, Big, Mega, and Giga builds: K2.6 Build Features. Since I have never used any router with USB storage capabilities, I can’t be sure but I think OpenVPN can be installed using ipkg as well.

For this post I am going to assume you’re an OS X user, but Windows procedures shouldn’t be too different.

1. Generating certificates and keys

  1. Get Easy-RSA. You can either clone the git repository or download the package as zip. Navigate to the folder where you downloaded/cloned Easy-RSA and get into the directory easy-rsa/2.0.
  2. Edit the file vars. I’m showing the variables that you might want to change. Take note of the KEY_SIZE variable. If you’re paranoid like me, leave it at 2048. It takes longer to generate DH parms but not that long.
    # Increase this to 2048 if you
    # are paranoid.  This will slow
    # down TLS negotiation performance
    # as well as the one-time DH parms
    # generation process.
    export KEY_SIZE=2048
     
    # In how many days should the root CA key expire?
    export CA_EXPIRE=3650
     
    # In how many days should certificates expire?
    export KEY_EXPIRE=3650
     
    # These are the default values for fields
    # which will be placed in the certificate.
    # Don't leave any of these fields blank.
    export KEY_COUNTRY="MY"
    export KEY_PROVINCE="SELANGOR"
    export KEY_CITY="Puchong"
    export KEY_ORG="AdyRomantika"
    export KEY_EMAIL="[email protected]"
    export KEY_OU="RomantikaName"
     
    # X509 Subject Field
    export KEY_NAME="MYKEY1"
  3. Import the variables into the current shell:
    $ source vars
  4. Clean existing keys if any (WARNING: This deletes all existing certificates and keys)
    $ ./clean-all
  5. Generate server certificates. The script will still ask for parameters you entered in vars so just press ENTER if you’re satisfied
    • This will produce 2 files: ca.key and ca.crt
    $ ./build-ca
  6. Generate Diffie Hellman parameters
    • This will produce the file: dh{n}.pem where {n} is the key size specified in the vars file.
    $ ./build-dh
  7. Generate key for the server.
    • When asked for a password, just press ENTER otherwise the key password will be asked each time service is being brought up.
    • When asked whether to sign the certificate, say Yes.
    • This will produce 3 files: server.crt, server.csr, server.key
    $ ./build-key-server server1
  8. Generate key for the clients. This step can be repeated in the future for more clients as needed.
    • When asked for a password, you can enter a password so that when connecting to the service, the key password will be asked. I recommend this to make it more secure.
    • When asked whether to sign the certificate, say Yes.
    • This will produce 3 files: client1.crt, client1.csr, client1.key
    $ ./build-key client1

Continue reading DD-WRT: OpenVPN Server Using Certificates

CrashPlan 3.5.3 Headless Upgrade

A headless installation of CrashPlan will fail when it tries to update itself.

This short post assumes that you already have it setup and successfully running before, and is targeted only to help you save some time by identifying important files to copy.

Running the installer again will also work, but we actually spend more time to fix the scripts and the identity file might get overwritten causing more time to figure out what happened.

So here goes. This is how we extract the tar archive and the cpio archive within it.

# CrashPlan_3.5.3_Linux.tgz
# cd CrashPlan-install
# cat CrashPlan_3.5.3.cpi | gzip -dc - | cpio -i --no-preserve-owner

Changed files for 3.4.1 to 3.5.3 (thanks to rsync) are:

lang/txt.properties
lang/txt_sv.properties
lang/txt_th.properties
lang/txt_tr.properties
lang/txt_zh.properties
lib/com.backup42.desktop.jar
lib/com.jniwrapper.jniwrap.jar
lib/com.jniwrapper.winpack.jar

All I did was replace those files, and my CrashPlan installation is working fine.

If you actually arrive here to find information on installing for the first time, this post can help you if you’re using a Dlink DNS-32X series. Follow it from start to end (with some adaptation to the paths) and you’ll be fine.

However, you might have to change paths and also do extra steps to get it working. At one point, CrashPlan will run fine but you’ll see that it’s not uploading files.

This post can help you troubleshoot the Java issues by replacing libraries.

From the top of my head I remember having to insert a new library with the correct architecture inside jna-3.2.5.jar, replace libmd5.so, and replace libjtux.so. I also had to link /ffp/usr/local/crashplan/libffi.so.5 to a location accessible by the system loader.

Good luck!

Is CloudFlare Reliable?

This website and some other websites I maintain had their ups and downs. All of my websites are running via CloudFlare.

When you are utilizing CloudFlare and your website is dynamic (not static HTML pages), CloudFlare will still need to contact the server where your website is hosted in order to get the latest content. Few examples of dynamic websites include the popular platform like WordPress (what this site is running), Joomla!, Drupal. That is a tiny list as an example.

Well, unless the host is running RailGun but that’s a totally different story for a different time.

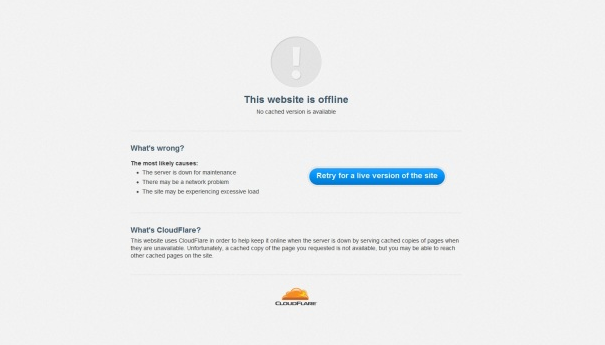
So this is the dreaded screen:

cloudflare-website-offline

I used to think that it was CloudFlare’s fault. But after a lot of observations, I do think that the hosting providers are not reliable enough especially if they are not Cloudflare certified. I’ve used popular providers in Malaysia (at least 3) and the USA (one giant), and I still receive this page a lot. Well, even if I don’t receive this page, I receive regular alerts from UptimeRobot telling me that my websites are not accessible.

All websites at the same time. So the most logical explanation was that the origin server was down.

I have had people emailing me telling their experience that CloudFlare is not reliable, but for me, it’s really good to save bandwidth and increase the load time for geographically scattered visitors. Sure, there are times when they make mistakes like what happened in February last year but hey, we’re all humans. Plus the service is really cheap compared to the value they provide.

Some hosting providers who aren’t aware about Cloudflare will mark the IPs as abusive since only CloudFlare IPs will access the website (Note: HTTP server logs can have real IPs using modules or configurations). Plus, providers who charge based on bandwidth will lose a significant amount of money to be billed to their customers since Cloudflare intercepts and caches static contents very well.

Because of this reason, the sites I own are now running in VPS fully managed by me. So far, after more than a month there isn’t a single case of downtime. So far so good.

So go ahead and give CloudFlare a try.

Redirecting WordPress Permalinks in Nginx

I know, it’s been really a long time since I last wrote an article in this blog. But trust me, I’ve done a lot of improvements at the back end. The blog is now in a new server, with new backup infrastructure, and most importantly served by Nginx.

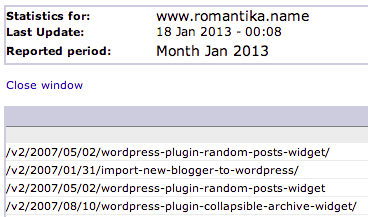
I was just casually looking at 404 errors in my Awstats and saw a bunch of these:

romantika.name-404-errors

I’ve changed the permalink structure for this site ages ago, and I did not notice this. I have no excuse for this mistake.

To avoid more 404 I made a simple fix in my Nginx configuration:

rewrite "/\d{4}/\d{2}/\d{2}/(.*)" /$1 permanent;

So now if visitors try to access https://blog.adyromantika.com/2007/05/02/wordpress-plugin-random-posts-widget/ they will be redirected to the new permalink https://blog.adyromantika.com/wordpress-plugin-random-posts-widget/

That’s it. I love Nginx for its simplicity and speed. I should thank my friends Welly and Englebert for promoting Nginx to me.

I love challenges using Regex so if you have any questions do leave a comment. Can’t guarantee in what year I will be able to respond though!

Sluggish iChat, Messages, Terminal, and Others in Mac OS X Lion

After about 60 days using my MacBook Pro running Mac OS X Lion (10.7.3), I saw some sluggishness in some apps. At first, it was Messages (iChat replacement for Mountain Lion). It went unresponsive and displays the rainbow wheel for a few seconds, enough to annoy an impatient user.

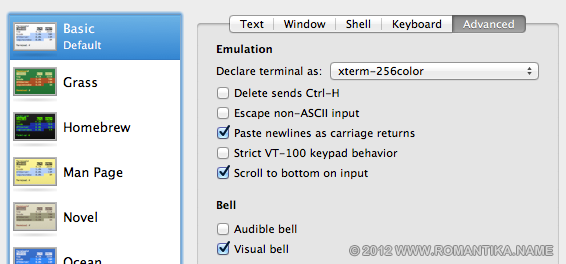
Then, the same behavior happened in Terminal. This is where I realize the common behavior. You know, when you press delete on an empty prompt, you get a bell. The default is the audible bell. When I change it to the visual bell, sluggishness disappeared.
On Messages, I had the default sound effect setting when messages are received or sent.

Boy was I right. In the log /var/log/system.log there were a bunch of these:

May  3 22:30:57 ADYMAC iChat[66352]: [Warning] Actions: Couldn't create SystemSound from /Applications/iChat.app/Contents/Resources/Received Message.aiff
May  3 22:31:07 ADYMAC iChat[66352]: [Warning] Unable to find a sound action ID for /Applications/iChat.app/Contents/Resources/Received Message.aiff  errorResult: 268435460
May  3 22:31:07 ADYMAC iChat[66352]: [Warning] Actions: Couldn't create SystemSound from /Applications/iChat.app/Contents/Resources/Received Message.aiff
May  3 22:31:17 ADYMAC iChat[66352]: [Warning] Unable to find a sound action ID for /Applications/iChat.app/Contents/Resources/Received Message.aiff  errorResult: 268435460

These are when I tried to change the system bell using the System Preferences application.

May 11 01:45:55 adymac System Preferences[44495]: Error 268435460 setting AlertSound
May 11 01:53:22 adymac System Preferences[44678]: Error 268435460 setting AlertSound
May 11 01:58:20 adymac System Preferences[44678]: Error 268435460 setting AlertSound
May 11 01:58:25 adymac System Preferences[44678]: Error 268435460 setting AlertSound

And so I tried a lot of things, including logging out then in, inspecting the file permissions, and also ran the verify permission utility on the hard disk using Disk Utility. Nothing worked.

Finally, I saw that there was one process called coreaudiod

_coreaudiod    45197   0.0  0.1  2453172   5228   ??  Ss   Fri02AM   0:10.52 /usr/sbin/coreaudiod

And so I tried killing it:

$ sudo killall coreaudiod

And as expected, it respawned itself and all audio effects were now working. Sluggishness and the dreaded rainbow wheel are gone.

Googling after, I saw that people mentioned that this may be a bug, and killing coreaudiod is only a workaround not the solution.

Come to think of it, it also caused unnecessary delay when making screen shots using the Command-Shift-4 key combination.

I hope this can save you some time.

Build LFTP on Mac OS X Lion

If you’re a seasoned Linux SysAdmin, you’ll miss LFTP. It’s a really powerful FTP client. Yes, you can also install it using MacPorts or Fink but right now, this is much quicker for me.

Here’s how I built LFTP 4.3.6 on my MacBook Pro. For the record, I’m on 10.7.3

Prerequisite: Apple developer tools (Xcode)

1. Download The GNU Readline Library (The library that came with OS X will not work). This is how I built Readline 6.2:

$ cd /where/readline/was/extracted
$ ./configure --prefix="/usr/local" --disable-shared && make && sudo make install

This will build a static library and install in it /usr/local

2. Make sure the library (libreadline.a) was built successfully in /usr/local/lib

3. Download LFTP and build it:

$ cd /where/lftp/was/extracted
$ CXXFLAGS="-O0 -Wall -fno-exceptions -fno-rtti -fno-implement-inlines" \
LDFLAGS="-Xlinker -search_paths_first -L/usr/local/lib" \
CPPFLAGS="-I/usr/local/include" \
./configure --with-openssl --disable-shared --disable-nls
$ make && sudo make install

In the lftp configure line, the “-Xlinker -search_paths_first” is necessary so that the linker will not prefer the system shared /usr/lib/libreadline.dylib to the static libreadline.a we just compiled.

The final binary will be installed into your /usr/local/bin/lftp and if your build was successful you should be able to run “lftp” and get the prompt:

lftp :~>

My LFTP version:

LFTP | Version 4.3.6 | Copyright (c) 1996-2012 Alexander V. Lukyanov
 
LFTP is free software: you can redistribute it and/or modify
it under the terms of the GNU General Public License as published by
the Free Software Foundation, either version 3 of the License, or
(at your option) any later version.
 
This program is distributed in the hope that it will be useful,
but WITHOUT ANY WARRANTY; without even the implied warranty of
MERCHANTABILITY or FITNESS FOR A PARTICULAR PURPOSE.  See the
GNU General Public License for more details.
 
You should have received a copy of the GNU General Public License
along with LFTP.  If not, see <http: //www.gnu.org/licenses/>.
 
Send bug reports and questions to the mailing list lftp at uniyar.ac.ru.
 
Libraries used: Readline 6.2, Expat 2.0.1, OpenSSL 0.9.8r 8 Feb 2011, libiconv 1.11, zlib 1.2.5

Good luck!

Perhaps some of you arrived by searching for “error: ‘rl_kill_full_line’ was not declared in this scope”. Yep, the above steps should help you.

Mac Messages Beta

Apple has just released the developer preview for OS X Mountain Lion yesterday and at the same time released the beta version of Messages, an upgrade of iChat. Here is the link to download Messages.

Installation is straight forward but you will be warned that the machine will need to be restarted. After installation, the spanking new icon will appear in the dock. The rightmost icon in the screenshot, not the middle one.

After installation (and configuration with your iCloud account), the familiar iChat UI will appear. Alongside with a new “iPad inspired” message list. Messages will continue to work with the existing accounts, just with additional features. As you can see in my screenshot my Google Talk (Jabber) account works fine.

I really wanted to know whether old messages from the iPhone will be imported. They were not. Which is no big deal. I’m not sure whether some background sync will happen while I use it. I’ll update if it does that.

I sent a test message to a buddy, Nazham:

At the same moment, my message and his reply appeared in both Messages for Mac and the iPhone. This is what Apple meant by “Start an iMessage conversation on your Mac and continue it on your iPad, iPhone, or iPod touch.”.

I love it.

Knowing Apple, Mountain Lion might be the only OS X I can upgrade my 2010 MacBook Pro with and I hope the price will be more or less like Lion.

Until next time, happy computing.

VirtueMart Custom Login Module in Joomla!

Here’s a short article on making a simple module to include on your Joomla! pages that displays login / logout links. I’m a Joomla! newbie so there might be better ways to accomplish this.

I was helping a friend-client to accomplish redirection to the same page after logout.

Here’s the basic code that you need to have in a module with the Jumi extension:

< ?php
    $user=& JFactory::getUser();
    if (!$user->guest)
        echo '<a href="index.php?option=com_user&task=logout&return=Lw">Logout</a>';
    else
        echo '<a href="index.php?page=account.index&option=com_virtuemart">Login</a>';
?>

The code above will redirect users to the root or uppermost level of the website.

Let’s say that your website is http://www.yourwebsite.com/ and your shopping page with VirtueMart is installed at a subfolder http://www.yourwebsite.com/shop/

The question is simply where you want your user to end up after logging out. If you need your users to end up at http://www.yourwebsite.com/ then you’re good to go. If you want your users to be redirected to the shop or a thank you page, here’s where you need to be a little creative.

You need to replace that “Lw” in the logout link to a different string. “Lw” is the base 64 representation of the character “/”. So this means that the user will be redirected to / which is http://www.yourwebsite.com/

A solution I came out with:

1
2
3
4
5
6
7
8
< ?php
    $redirect_to = '/shop/';
    $user=& JFactory::getUser();
    if (!$user->guest)
        echo '<a href="index.php?option=com_user&task=logout&return=' . base64_encode($redirect_to) . '">Logout</a>';
    else
        echo '<a href="index.php?page=account.index&option=com_virtuemart">Login</a>';
?>

So only line 2 needs to be changed. Let’s say you want users to be redirected to http://www.yourwebsite.com/thankyou.html here’s how you will change line 2:

2
    $redirect_to = '/thankyou.html';

If you’d like your users to simply be redirected to the same page where they clicked the logout link, here’s what you should do to line 2:

2
    $redirect_to = $_SERVER['REQUEST_URI'];

That’s simply it. At first, I totally forgot that I can use PHP’s base64_encode so I ended up confusing my friend with an online encoder so that he can replace the “Lw”.

One annoying thing that I wasn’t able to solve is the login page always displays the error message:

Error: You do not have permission to access the requested module.

I think Joomla! is trying to load VirtueMart too early and I can’t make it go away. Looking at the Internet a lot of other websites has this message displayed. If you know how this message can be removed without hacking the CSS or source code, please let me know and I’ll give you credit.

References:

  1. http://forum.virtuemart.net/index.php?topic=88802#msg290906
  2. http://forum.joomla.org/viewtopic.php?p=1457876

Leverage Browser Caching

In the previous post I wrote about enabling compression for your pages so that they would load faster to the visitor. Today I’m going to write about how you can make use of browser caching to save some bandwidth.

Some people told me that their ISP or hosting provider requested that they upgrade the hosting plan or subscribe for more bandwidth. Since this site doesn’t have that much traffic, I wouldn’t know.

However recently I was able to help on a website which has a lot of visitors compared to this site. Around 14-18 visitors per minute on a working day and the bandwidth usage was very high, more than a gigabyte per day.

For the website, I saw that there were many requests for images (photos). The images aren’t that big anyway, around 100KB each but the amount of request made it significant.

Armed with knowledge of mod_expires, I added the following clauses to .htaccess while hoping that the server has the module installed. The following configuration is minimal, and Google Pagespeed actually suggests for 1 week.

<ifmodule mod_expires.c>
        ExpiresActive On
        ExpiresByType image/gif "access plus 2 hours"
        ExpiresByType image/png "access plus 2 hours"
        ExpiresByType image/jpg "access plus 2 hours"
        ExpiresByType image/jpeg "access plus 2 hours"
        ExpiresByType text/css "access plus 2 hours"
        ExpiresByType application/javascript "access plus 2 hours"
        ExpiresByType application/x-javascript "access plus 2 hours"
</ifmodule>

Although I know why Google Analytics set its expiry to 2 hours, it’s kind of amusing since the suggestion comes from another Google product. Oh well I am allowed to be amused right?

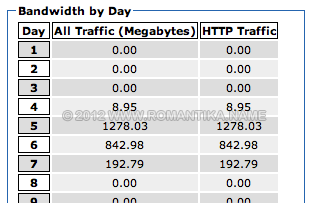
So let’s get to the results. Here are the bandwidth graphs from both days. I enabled mod_expires at around 6PM on 5 January 2012.

We can’t really see the difference by looking at the graphs. Google Analytics shows that there are at least 200 more visits on 6 January 2012. The numbers? Here you go:

At least 400MB were saved by this technique. You can actually put specific settings for each folder in your website. For example 2 hours is nice for cosmetic images which may need to be changed frequently but not for photos. For example if you run a photography website, you can even make your photos to expire in 1 year!

What mod_expires does is actually telling the browser that the resource (images) will expire on a specific date. It’s flexible enough to set the date from the access time. Here is the link to the official manual page for mod_expires.

Please be careful to note that this is not a quick solution for the lazy. You must think hard enough to set the proper amount of time before the images expire otherwise normal users will not see your changes or updates to the image until the cache on their browsers expire!

Good luck!