DD-WRT: OpenVPN Server Using Certificates

GUI confuses me sometimes, so I prefer to make configurations in text files. For DD-WRT, OpenVPN server is available in OpenVPN, OpenVPN Small, Big, Mega, and Giga builds: K2.6 Build Features. Since I have never used any router with USB storage capabilities, I can’t be sure but I think OpenVPN can be installed using ipkg as well.

For this post I am going to assume you’re an OS X user, but Windows procedures shouldn’t be too different.

1. Generating certificates and keys

  1. Get Easy-RSA. You can either clone the git repository or download the package as zip. Navigate to the folder where you downloaded/cloned Easy-RSA and get into the directory easy-rsa/2.0.
  2. Edit the file vars. I’m showing the variables that you might want to change. Take note of the KEY_SIZE variable. If you’re paranoid like me, leave it at 2048. It takes longer to generate DH parms but not that long.
    # Increase this to 2048 if you
    # are paranoid.  This will slow
    # down TLS negotiation performance
    # as well as the one-time DH parms
    # generation process.
    export KEY_SIZE=2048
     
    # In how many days should the root CA key expire?
    export CA_EXPIRE=3650
     
    # In how many days should certificates expire?
    export KEY_EXPIRE=3650
     
    # These are the default values for fields
    # which will be placed in the certificate.
    # Don't leave any of these fields blank.
    export KEY_COUNTRY="MY"
    export KEY_PROVINCE="SELANGOR"
    export KEY_CITY="Puchong"
    export KEY_ORG="AdyRomantika"
    export KEY_EMAIL="[email protected]"
    export KEY_OU="RomantikaName"
     
    # X509 Subject Field
    export KEY_NAME="MYKEY1"
  3. Import the variables into the current shell:
    $ source vars
  4. Clean existing keys if any (WARNING: This deletes all existing certificates and keys)
    $ ./clean-all
  5. Generate server certificates. The script will still ask for parameters you entered in vars so just press ENTER if you’re satisfied
    • This will produce 2 files: ca.key and ca.crt
    $ ./build-ca
  6. Generate Diffie Hellman parameters
    • This will produce the file: dh{n}.pem where {n} is the key size specified in the vars file.
    $ ./build-dh
  7. Generate key for the server.
    • When asked for a password, just press ENTER otherwise the key password will be asked each time service is being brought up.
    • When asked whether to sign the certificate, say Yes.
    • This will produce 3 files: server.crt, server.csr, server.key
    $ ./build-key-server server1
  8. Generate key for the clients. This step can be repeated in the future for more clients as needed.
    • When asked for a password, you can enter a password so that when connecting to the service, the key password will be asked. I recommend this to make it more secure.
    • When asked whether to sign the certificate, say Yes.
    • This will produce 3 files: client1.crt, client1.csr, client1.key
    $ ./build-key client1

Continue reading DD-WRT: OpenVPN Server Using Certificates

WordPress Update: Upgrade package not available (3.5)

I used to upgrade WordPress manually using FTP. I would update a local copy of the website, make sure everything works on my laptop and then upload it to the server. Not that I don’t trust WordPress automatic upgrade but I am paranoid that my custom plugins and changes will break the site.

However, starting from early 2012 I began to use the upgrade functionality within WordPress. Everything went really well until after I upgraded to 3.5

I wasn’t able to upgrade to 3.5.1 but I was able to upgrade another blog with earlier version than 3.5 to 3.5.1. So I thought it might be a problem with the settings or permissions on this site.

wordpress-update-upgrade-package-not-available

Today, I looked at the issue again. What I found is that there is a discrepancy between the upgrade code and the data returned by API.

The code failed here wp-admin/includes/class-wp-upgrader.php:

111   function download_package($package) {
116     if ( empty($package) )
117       return new WP_Error('no_package', $this->strings['no_package']);
127   }

Called within the same file:

878     $download = $this->download_package( $current->package );
879     if ( is_wp_error($download) )
880       return $download;

There are a lot more tracing done, but ultimately line 878 will always fail because $current does not have the property package:

stdClass Object
(
    [response] => upgrade
    [download] => http://wordpress.org/wordpress-3.6.zip
    [locale] => en_US
    [packages] => stdClass Object
        (
            [full] => http://wordpress.org/wordpress-3.6.zip
            [no_content] => http://wordpress.org/wordpress-3.6-no-content.zip
            [new_bundled] => http://wordpress.org/wordpress-3.6-new-bundled.zip
            [partial] => 
        )
 
    [current] => 3.6
    [php_version] => 5.2.4
    [mysql_version] => 5.0
    [new_bundled] => 3.6
    [partial_version] => 
    [dismissed] => 
)

I wanted to create a Trac ticket but realized that this should have been fixed, and this is a backward compatible issue anyway. Looking at the new code http://core.trac.wordpress.org/browser/trunk/wp-admin/includes/class-wp-upgrader.php?rev=24474 I am able to see that the packages properties has been handled.

A quick look at 3.5.1 also suggests that the new data returned has been handled correctly.

   1036     // If partial update is returned from the API, use that, unless we're doing a reinstall.
   1037     // If we cross the new_bundled version number, then use the new_bundled zip.
   1038     // Don't though if the constant is set to skip bundled items.
   1039     // If the API returns a no_content zip, go with it. Finally, default to the full zip.
   1040     if ( $current->packages->partial && 'reinstall' != $current->response && $wp_version == $current->partial_version )
   1041       $to_download = 'partial';
   1042     elseif ( $current->packages->new_bundled && version_compare( $wp_version, $current->new_bundled, '< ' )
   1043       && ( ! defined( 'CORE_UPGRADE_SKIP_NEW_BUNDLED' ) || ! CORE_UPGRADE_SKIP_NEW_BUNDLED ) )
   1044       $to_download = 'new_bundled';
   1045     elseif ( $current->packages->no_content )
   1046       $to_download = 'no_content';
   1047     else
   1048       $to_download = 'full';
   1049 
   1050     $download = $this->download_package( $current->packages->$to_download );
   1051     if ( is_wp_error($download) )
   1052       return $download;

My quick and dirty hack is to edit wp-admin/includes/class-wp-upgrader.php

    878     $download = $this->download_package( 'http://wordpress.org/wordpress-3.6-no-content.zip' );

Just like that, and upgrade was quick. If you’re stuck in 3.5 you can try it out.

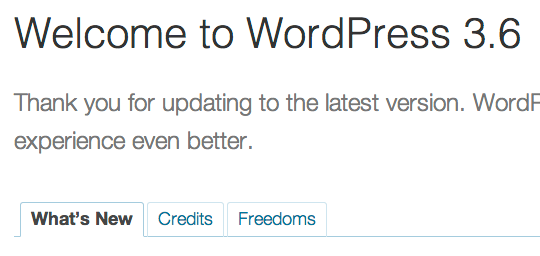
welcome-worpress-3.6

Happy 10th Anniversary WordPress!

Today marks the 10th anniversary of WordPress which was first released on May 27th, 2003.

WordPress now powers countless number of blogs in the Internet via the community driven project WordPress.org and the hosted solutions at WordPress.com.

This site has been running on WordPress since the beginning, in 2005.

Being sick today, I will not be able to make it to any meetups 🙁

Happy 10th Anniversary, WordPress!

CrashPlan 3.5.3 Headless Upgrade

A headless installation of CrashPlan will fail when it tries to update itself.

This short post assumes that you already have it setup and successfully running before, and is targeted only to help you save some time by identifying important files to copy.

Running the installer again will also work, but we actually spend more time to fix the scripts and the identity file might get overwritten causing more time to figure out what happened.

So here goes. This is how we extract the tar archive and the cpio archive within it.

# CrashPlan_3.5.3_Linux.tgz
# cd CrashPlan-install
# cat CrashPlan_3.5.3.cpi | gzip -dc - | cpio -i --no-preserve-owner

Changed files for 3.4.1 to 3.5.3 (thanks to rsync) are:

lang/txt.properties
lang/txt_sv.properties
lang/txt_th.properties
lang/txt_tr.properties
lang/txt_zh.properties
lib/com.backup42.desktop.jar
lib/com.jniwrapper.jniwrap.jar
lib/com.jniwrapper.winpack.jar

All I did was replace those files, and my CrashPlan installation is working fine.

If you actually arrive here to find information on installing for the first time, this post can help you if you’re using a Dlink DNS-32X series. Follow it from start to end (with some adaptation to the paths) and you’ll be fine.

However, you might have to change paths and also do extra steps to get it working. At one point, CrashPlan will run fine but you’ll see that it’s not uploading files.

This post can help you troubleshoot the Java issues by replacing libraries.

From the top of my head I remember having to insert a new library with the correct architecture inside jna-3.2.5.jar, replace libmd5.so, and replace libjtux.so. I also had to link /ffp/usr/local/crashplan/libffi.so.5 to a location accessible by the system loader.

Good luck!

Is CloudFlare Reliable?

This website and some other websites I maintain had their ups and downs. All of my websites are running via CloudFlare.

When you are utilizing CloudFlare and your website is dynamic (not static HTML pages), CloudFlare will still need to contact the server where your website is hosted in order to get the latest content. Few examples of dynamic websites include the popular platform like WordPress (what this site is running), Joomla!, Drupal. That is a tiny list as an example.

Well, unless the host is running RailGun but that’s a totally different story for a different time.

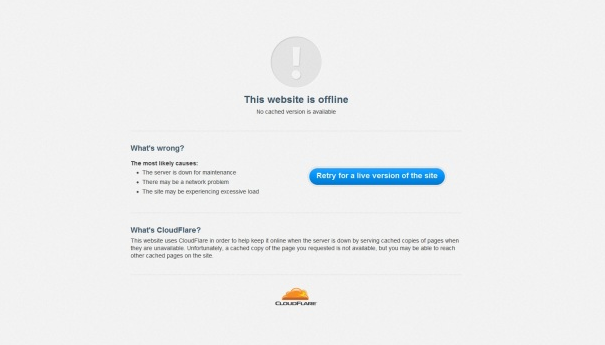
So this is the dreaded screen:

cloudflare-website-offline

I used to think that it was CloudFlare’s fault. But after a lot of observations, I do think that the hosting providers are not reliable enough especially if they are not Cloudflare certified. I’ve used popular providers in Malaysia (at least 3) and the USA (one giant), and I still receive this page a lot. Well, even if I don’t receive this page, I receive regular alerts from UptimeRobot telling me that my websites are not accessible.

All websites at the same time. So the most logical explanation was that the origin server was down.

I have had people emailing me telling their experience that CloudFlare is not reliable, but for me, it’s really good to save bandwidth and increase the load time for geographically scattered visitors. Sure, there are times when they make mistakes like what happened in February last year but hey, we’re all humans. Plus the service is really cheap compared to the value they provide.

Some hosting providers who aren’t aware about Cloudflare will mark the IPs as abusive since only CloudFlare IPs will access the website (Note: HTTP server logs can have real IPs using modules or configurations). Plus, providers who charge based on bandwidth will lose a significant amount of money to be billed to their customers since Cloudflare intercepts and caches static contents very well.

Because of this reason, the sites I own are now running in VPS fully managed by me. So far, after more than a month there isn’t a single case of downtime. So far so good.

So go ahead and give CloudFlare a try.

Redirecting WordPress Permalinks in Nginx

I know, it’s been really a long time since I last wrote an article in this blog. But trust me, I’ve done a lot of improvements at the back end. The blog is now in a new server, with new backup infrastructure, and most importantly served by Nginx.

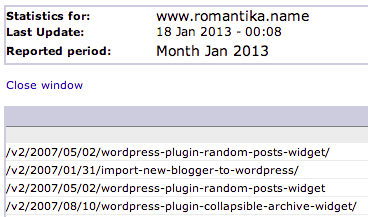
I was just casually looking at 404 errors in my Awstats and saw a bunch of these:

romantika.name-404-errors

I’ve changed the permalink structure for this site ages ago, and I did not notice this. I have no excuse for this mistake.

To avoid more 404 I made a simple fix in my Nginx configuration:

rewrite "/\d{4}/\d{2}/\d{2}/(.*)" /$1 permanent;

So now if visitors try to access https://blog.adyromantika.com/2007/05/02/wordpress-plugin-random-posts-widget/ they will be redirected to the new permalink https://blog.adyromantika.com/wordpress-plugin-random-posts-widget/

That’s it. I love Nginx for its simplicity and speed. I should thank my friends Welly and Englebert for promoting Nginx to me.

I love challenges using Regex so if you have any questions do leave a comment. Can’t guarantee in what year I will be able to respond though!